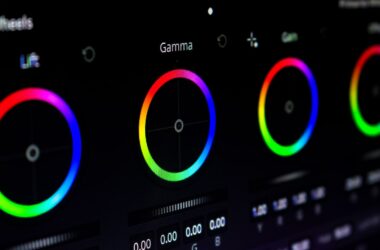
Monitor calibration has a snake oil problem. On one side, marketing that says “factory calibrated” like it’s a permanent condition, like panels don’t drift the day they leave the loading dock. On the other, forum wisdom insisting you need a $1,500 spectroradiometer and facility software or you’re “not really calibrated.” Both are selling you something. The truth is cheaper and more boring: a $199 puck, the right software, a dark wall, and a monthly habit.
This is the trust piece behind the grading monitor guide. That article tells you what to buy; this one is about making whatever you own tell the truth, and knowing exactly which parts of the calibration industry deserve your money. Spoiler: fewer parts than you’d think.
Last updated: July 2026. Some links below are affiliate links. Buy through them and it helps keep the site running, at no extra cost to you. I only point at gear I’d be comfortable handing to a friend.
What calibration actually does (and doesn’t)
Calibration is two separate jobs that get blurred together. First, measurement: a sensor sits on your screen while software flashes color patches and records how far off each one lands from the standard (that’s your Delta E number… under 2 is good, under 1 is excellent, over 3 means your monitor is freelancing). Second, correction: the software builds a fix so the errors get canceled before they hit your eyeballs. Where that fix lives determines whether your whole pipeline is actually fixed or just part of it, and that’s the section most guides skip. We’re not skipping it.
What calibration does not do: make a bad panel good. A 6-bit TN screen calibrated within an inch of its life is still a 6-bit TN screen. Calibration removes lies; it doesn’t add gamut, contrast, or uniformity that the hardware never had. That’s why the monitor guide comes first.
The probe: one correct answer and one upsell
Colorimeters versus spectroradiometers, thirty seconds, no snake oil. A spectroradiometer measures the actual light spectrum and is the accuracy reference; it’s also slow, bad in shadows, and starts around used-car money. A colorimeter uses filtered sensors, is fast and cheap and great in the dark shadows where grades live, but needs a correction matrix for each display technology. Here’s the part the upsell leaves out: the pro workflow is to use a spectro once to profile the colorimeter, then do all the real work with the colorimeter. Dolby’s own support docs describe exactly this. Modern calibration software ships those correction matrices built in, which means for a freelancer or small studio, the colorimeter alone is not the compromise option. It’s the correct option.
The one to buy is the Calibrite Display Pro HL. It’s the successor to the X-Rite i1Display Pro that lived in every colorist’s drawer for a decade, it reads LCD, mini-LED, QD-OLED, and Apple’s XDR panels up to 3,000 nits, and every software path in this article supports it: DisplayCAL, Calman, ColourSpace, and the hardware calibration tools from ASUS and BenQ. It lists at $279 and dips to $199 on sales that come around like buses. At this writing it’s $199 on Amazon. That’s the whole recommendation. One puck.

The step-up exists and you probably don’t need it: the Display Plus HL is the same platform rated to 10,000 nits instead of 3,000. Unless you’re measuring an HDR mastering-class panel (you’d know; it cost five figures), the extra $60 buys headroom you’ll never use. I include it for completeness and for the three of you with super-bright mini-LED walls. Datacolor’s SpyderPro (~$269) is the other brand’s fine-but-not-better answer; the Calibrite remains the default.

Software vs hardware calibration (the part that actually matters)
Here’s the distinction that separates people who calibrate from people who understand what they calibrated. Software calibration (the normal kind) measures your display and writes an ICC profile plus correction curves that load into your graphics card. The catch: GPU gamma tables are 1D curves. They can fix grayscale tracking and white point, but they’re a blunt tool, aggressive corrections cost you tonal precision (hello banding), and the whole fix lives on that one computer, inside the operating system’s color management.
Hardware calibration writes the corrections into the monitor itself, into a high-precision internal LUT (BenQ’s SW photo line uses 14-to-16-bit 3D LUTs; ASUS ProArt monitors store it in the display’s own scaler chip). The correction travels with the monitor across every input and every computer, and the precision is far beyond what a GPU curve can do. This is a feature you buy, not a technique: the monitor has to support it. It’s a big part of why the PA32UCDM earns its slot in the monitor guide, and why “supports hardware calibration” should be on your spec checklist above refresh rate, above HDR badges, above almost everything.
The blind spot: your I/O box doesn’t care about your ICC profile
Now the gotcha that catches even careful people. If your grading display hangs off a DeckLink or UltraStudio (like the color suite guide recommends), that signal path bypasses OS color management entirely. On purpose. That’s the whole point of an I/O box: an unmanaged, untouched video signal. Which means… your lovingly created ICC profile does absolutely nothing to that feed. Zero. The clean-feed pipeline gets corrected differently: either hardware calibration inside the monitor, or a correction 3D LUT loaded into Resolve’s monitor LUT slot (Calman can generate exactly that, speaking Resolve’s test patterns over the network and spitting out a .cube file). If you’ve ever calibrated your system and wondered why the client monitor still looks different: this. It’s always this.
The software landscape, honestly priced
DisplayCAL (free) is still the freelancer workhorse in 2026, with an asterisk: the original project went unmaintained, and the living version is the community fork, displaycal-py3, which shipped a release this very month. It drives the Display Pro HL, does profiling, verification, and correction LUTs, and costs nothing. Rough edges on brand-new macOS releases are the known tax. Calman is the pro tier: Calman Studio is $1,199 and is what you want for the Resolve 3D LUT workflow above; Calman Home at $145 is a per-TV-brand product for calibrating consumer TVs, useful for the client-viewing OLED on the wall, not your desktop monitor. Light Illusion ColourSpace is facility-grade and quote-priced, which tells you whether it’s for you. And the monitor makers’ own tools (ASUS ProArt Calibration, BenQ Palette Master Ultimate) are free and are the correct choice when your monitor supports hardware calibration, because they write to the monitor’s LUT directly.
Special case: if you’re on an Apple XDR display or a MacBook Pro, Apple’s reference modes already do most of this job. Each preset pins the color space, white point, gamma, and brightness to a standard (the HDR Video preset is a genuine P3/ST 2084 mastering-adjacent mode), and Apple supports in-field fine-tuning with pro instruments. For SDR web work on those machines, select the right preset and go make something. That’s not laziness; that’s Apple having done the work and charged you for it already.
The room is part of the instrument
A calibrated monitor in a bad room is still a lying setup, because the last processing stage is your visual system, and it recalibrates itself to whatever surrounds the screen. The standards are specific here: SMPTE’s viewing-environment spec puts the light behind the display around 10% of the screen’s peak white, at D65, on a neutral wall. In practice that’s a proper bias light, not a $12 RGB strip pretending “6500K” means something spectrally (it doesn’t; cheap strips fail the color rendering tests hard). The MediaLight Mk2 v2 is the one that actually measures D65 with CRI 98, it’s what Flanders Scientific resells for its own reference monitors, and it starts around $73 direct (no Amazon; they left on purpose). Cheapest real upgrade in this whole article.

How often, and the honest maintenance schedule
Panels drift with age, with brightness changes, and as the backlight or OLED emitters wear. The meter makers say monthly (Datacolor) to weekly for pros (X-Rite’s old guidance), and monthly is the honest freelancer cadence: first Monday, coffee, probe on screen, 20 minutes, done. Recalibrate immediately after changing brightness, after moving the monitor, and before any project where color is contractually your problem. A full characterization run on DisplayCAL takes 15 to 30 minutes; you don’t babysit it. If your monitor hasn’t met a probe since you unboxed it, “factory calibrated” stopped being true months ago… that phrase means “it was accurate once, in a lab, at settings you’ve since changed.” The serial-numbered report in the box is real. Its expiration date is not printed on it.
The snake oil list
Things you can safely not spend money on. A spectroradiometer (facilities profile probes with them; you buy the puck they profiled). Facility software tiers, unless a contract names them. “Calibration” services that come to your house with the same $199 puck you could own. NVIDIA/AMD driver “vibrance” anything. Monitor “cinema modes.” And any monitor purchase justified solely by a “factory calibrated” sticker without a Delta E report to back it up. The whole legitimate stack for a freelancer is: good panel, Display Pro HL, free-or-cheap software, bias light, monthly habit. Under $300 on top of the monitor. Everything past that is for facilities, or for fun.
Where this fits in your suite
Calibration is step two of three. Step one is a monitor worth calibrating, step three is the signal chain and room that let you trust what you see. Once all three are honest, THEN we can talk about going faster.
And that’s it! As always, what you see here is what works for me, my clients, and my crew. Calibration isn’t glamorous, but neither is redelivering a spot because the blacks were lifted on your end. Twenty minutes a month buys you the right to trust your own eyes. Questions about your setup? Comments are open. The rest of our guides live on the Gear Guides page.