After many days (or perhaps weeks) of working with your clients or partners to create perfect edits; the time has come to export your three beautiful edits. A:30 second ad, a:15 second cutdown, a:6 second super-cutdown. You select all three, hit export, and write up a pretty email with your edits posted to Frame.io, send it to the client, they approve, and now you get your paycheck. Yay!!!¡¡¡…..waittt… that never happens. What instead happens is:
Hello [insert your name here],
We love your edits but we need 1×1, 4×5, 9×16, and 16×9 versions of all the spots. Oh, can we also get them in versions ready for social media, broadcast, and OTT video formats?
Oh and also… can we get versions with captions burned in too?
Best,
Your Dearest Client.
“Well sh*t” you say. “Now my 3 exports have multiplied to 24…”
Ehh… it’s not that bad. Just plan it. Now, if you are new to the ad world, you might be completely shocked and taken back. That is a ton of exports… what if they have changes, do I have to export all of that?? Well, yes they will and you will. But that is just advertising, get used to it 😬. You are no longer making wedding videos for your best friend’s sister, you are an editing professional doing work for advertising professionals. Doing ad campaigns require many different types of formats so that they can be funneled and a/b tested to the correct consumer to be as efficient as possible. The video that was produced might have cost $50,000 but the ad spend… could be in the millions. The client needs to get the most out of that budget so they are going to need everything they could possibly need to achieve maximum ad spend efficiency.
But just as they are trying to achieve maximum efficiency on their end, you need to organize your editing workflow to be as efficient on your end too.
Don’t have an existential crisis.
It’s okay, we will break this all down so that we can achieve two main goals.
- Minimize errors
- Improve turnover times
The Campaign Finishing Process
To begin, let’s look at the work we have set out for us and the type of exports we need to create. It is important to treat each export as a separate sequence. DO NOT think that you will be able to just version within Media Encoder. You won’t and you will make mistakes.
With that being said, let’s look at the sequences we’ve been asked for and what they are.
- Broadcast: includes 5 seconds of slate, 1 frame of Bars & Tone, and 2 seconds of black before the spot plays. (Read about broadcast specs here)
- 16×9 Only.
- Video: ProRes 422 HQ
- Audio: Broadcast Levels
- Subtitles are in a separate SRT file.
- 16×9 Only.
- OLV (Online Video): (For OTT media): Does not have a slate
- 16×9 Only
- Video: ProRes 422 HQ
- Audio: Digital Levels
- Subtitles are in a separate SRT file.
- 16×9 Only
- Socials
- 16×9, 4×5, and 1×1 versions.
- Video: H.264
- Audio: Digital Levels
- Subtitles are burned in for some and also left off on others.
- 16×9, 4×5, and 1×1 versions.
Now, for sake of clarity, we are only going to version one video. However, this same workflow is infinitely scalable and adjustable depending on your clients’ needs.
In this example we will be looking at how to export a:
- Broadcast 16×9 with SRT file
- OLV 16×9 with SRT file
- Social 16×9 with Subtitles
- Social 16×9 without Subtitles
- Social 4×5 with Subtitles
- Social 1×1 with Subtitles
Sequences for Sub-Sequencing and Resizing
When all your master sequences are client-approved, it’s time to get your project ready for social cutdowns. Since you’ll be doing multiple exports, having duplicate versions of your master sequence will be immensely helpful for nesting the new sequences.
For each master sequence, duplicate them twice. For the first one, title it: CampaignName_SpotName_Length_4x5_REF
Here is an example from a previous campaign:
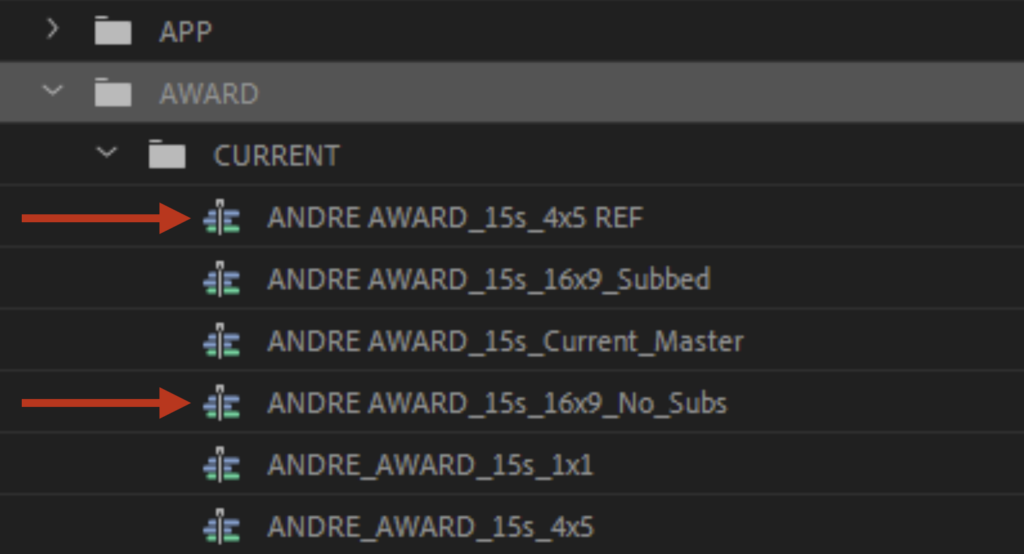
“ANDRE AWARD_15s_4x5_REF” This sequence will be used for your 4×5 resize since 4×5 positioning usually takes a bit more tweaking than the 1×1 resizing.
Your 2nd duplicate would be for your other social cutdowns, including your 1×1 sequence and your other 16×9 sequences (with and without subtitles). When naming this 2nd duplicate, title it CampaignName_SpotName_Length_16x9_No_Subs.
Please note that both of your duplicate master sequences will have any L3 (lower thirds text) and legal disclaimers disabled, as those will need to be resized and adjusted individually in each resized sequence.
Your master sequence will still retain L3 and legal since it will be used for your OLV and Broadcast exports.
Sub-Sequencing In Premiere Explained
So…sub-sequencing. When we say sub-sequencing, we don’t mean highlighting clips and selecting “Sub-Sequence”. Rather, you’ll be dragging the master sequences into your cutdown sequences.
Start by creating new sequences in the project bin for the following (See Image 1):
- 16×9 (Subbed)
- 1×1
- 4×5
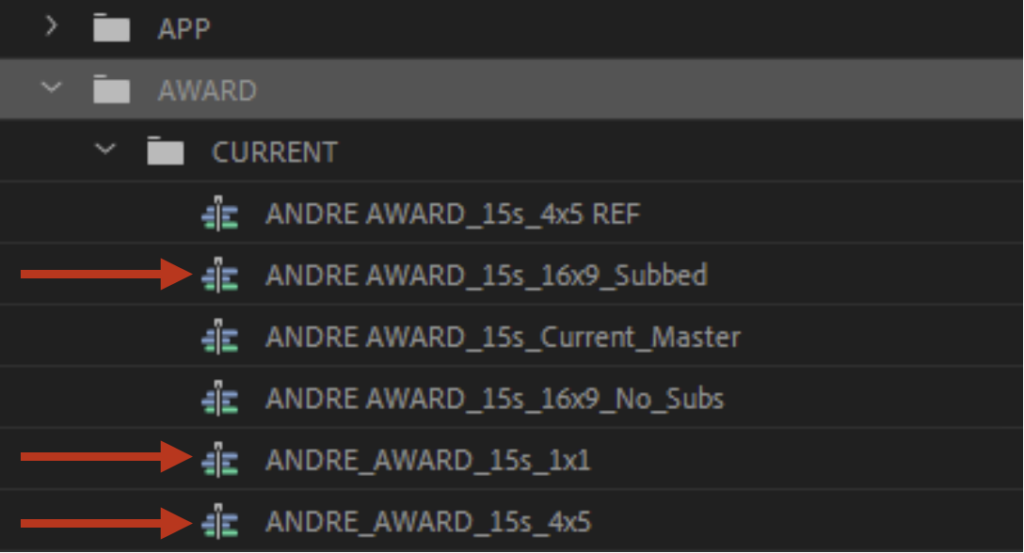
Once your cutdown sequences are made, you’re going to drag the master sequences (that you created in the first step) into your new timeline. After checking that off, right-click the sequence and select “Scene Edit Detection”. Check the box that says “Apply a cut at each detected cut point”, and with that, you should have your cutdown sequences ready for resizing.
As for your Broadcast and OLV sequences, simply create new 16×9 sequences within the Broadcast and OLV folders (not shown in the above image) for each spot. Drag the original Master sequence into these timelines. There is no need to go through scene edit detection, as these sequences don’t need resizing. The OLV sequences will be exported as is, but make sure the Broadcast sequences all have 5 seconds of slate, 1 frame of Bars & Tone, and 2 seconds of black before the sub-sequence starts.
Resizing
When it comes to resizing for your 4×5 and 1×1 sequences, there will be varying factors but the main ones to keep in mind are listed below which will result in the best quality and consistency across spots:
- People/objects should be mostly centered in the frame
- No white (or black) borders.
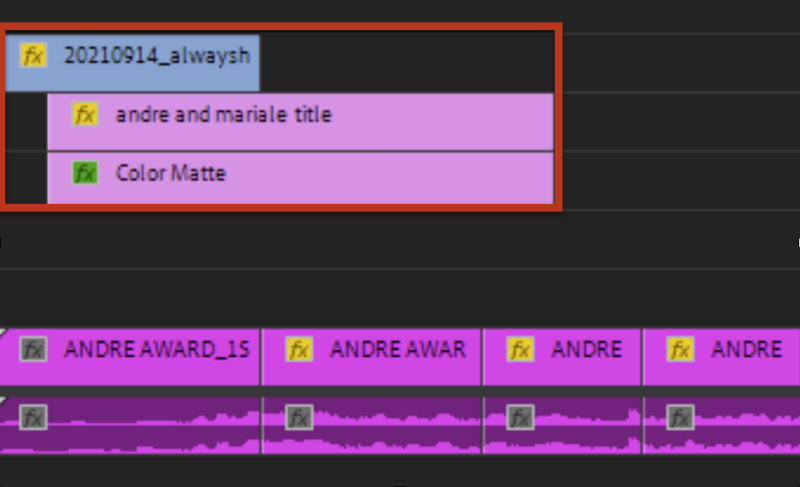
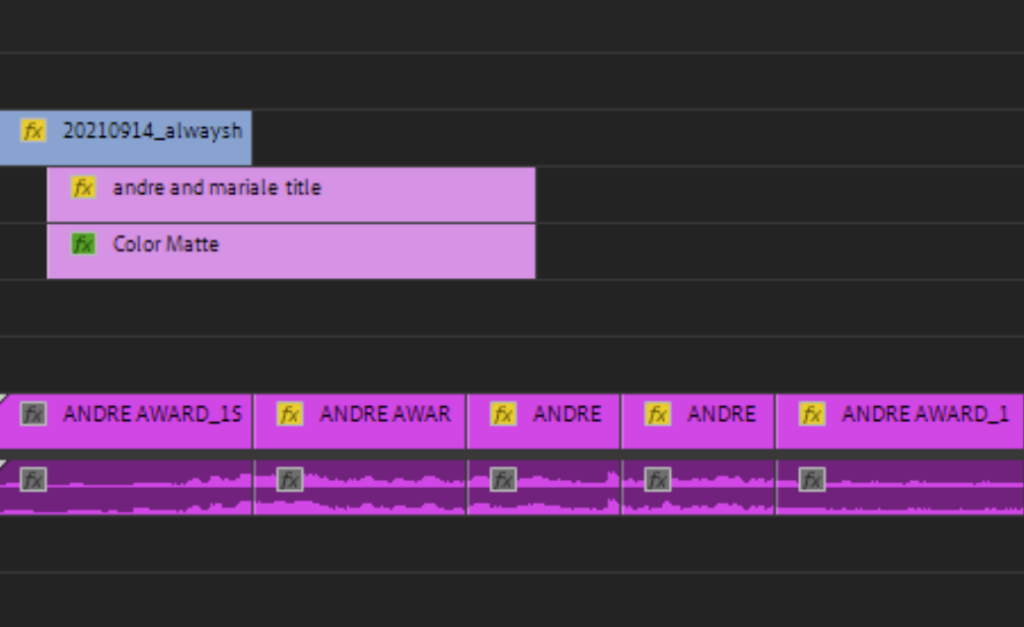
- Opening and End cards will need to be resized and centered (Copy and Paste from the master sequences), See Pic 1
- L3 positions and sizing will need to be readjusted
- Legal disclaimer sizing and positions will need to be readjusted (Different sizes and positions for 1×1 spots and 4×5 spots)
- All GFX will need to be resized and centered (Copy and Paste from the master sequences), See Pic 2
Have great looking subtitles
As for subtitles, that will vary depending on your clients’ requests. A great starting point however is to make sure that your font is set to Helvetica, and your font size is 50. Your subs should not exceed 2 lines, with up to 9 words on each line. They should also fit within safe margins.
In terms of subtitle appearance/background, refer to Picture 1 here for reference:
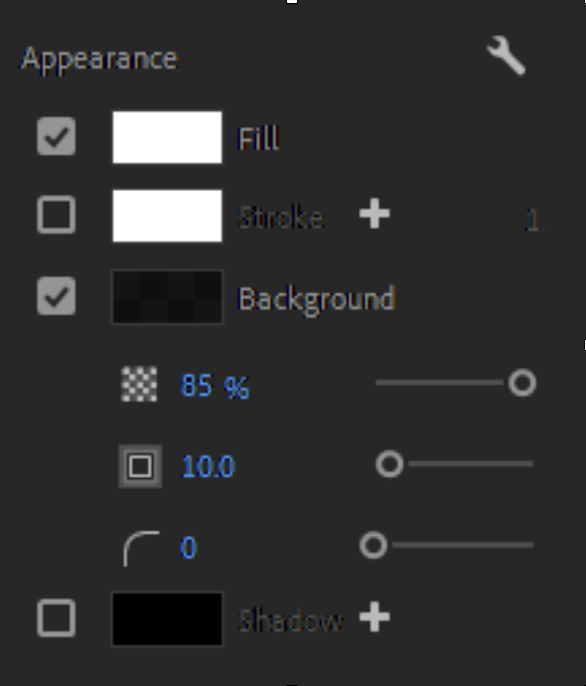
Your subtitle text will be white, with a black background. The opacity of background is set to 85% with Size set to 10.
Legal doesn’t have to look bad
When it comes to legal, the actual disclaimers will vary based on client requests. When it comes to the style of the legal, however, they are generally all very similar.
A simple rule is to use the grey text on white backgrounds, and white text in all other backgrounds.
As mentioned on the last slide, you’ll be resizing and readjusting them based on the type of cutdown you’re working with (1×1 or 4×5). To have a better gauge of correct positioning, enable safe margins in your preview window settings. On 16×9 sequences, legal should fit in the space between the margins, whereas on 4×5 and 1×1 sequences, they should fit right below the safe margins. All legal should use Helvetica font for optimum readability.
Exporting your videos efficiently
You have come to the end. All that is left, is to export. You will be batch exporting the Broadcast, OLF, and Socials separately. The best way is to select all in each category, right-click, and click “Add to Media Encoder Queue.” Within Media Encoder, select the correct preset for each batch.
To summarize:
- Broadcast: includes 5 seconds of slate, 1 frame of Bars & Tone, and 2 seconds of black before the spot plays. (Read about broadcast specs here)
- 16×9 Only.
- Video: ProRes 422 HQ
- Audio: Broadcast Levels
- Subtitles are in a separate SRT file.
- 16×9 Only.
- OLV (Online Video): (For OTT media): Does not have a slate
- 16×9 Only
- Video: ProRes 422 HQ
- Audio: Digital Levels
- Subtitles are in a separate SRT file.
- 16×9 Only
- Socials
- 16×9, 4×5, and 1×1 versions.
- Video: H.264
- Audio: Digital Levels
- Subtitles are burned in for some and also left off on others.
- 16×9, 4×5, and 1×1 versions.
Adobe Media Encoder Presets
To speed things up, I have decided to make Adobe Media Encoder export presets (.epr files) for you absolutely free! To ensure that you’re not limited to this article’s example deliverables, I have added the full list of export presets for any project you could possibly need.
Media Encoder Presets
The essential Media Encoder preset pack for editing projects large and small.
You Made it
Congratulations, we covered how to efficiently export numerous deliverables while making sure any picture changes are linked back to the master sequences.
Now, off to the edits! Personally, when I do these deliveries, I like to listen to Drum n’ Bass. Here is a curated playlist of some of my favorite tracks:
Enjoy ☺️


